Installing Python and Pycharm
Basic set up notes for working with Python and Pycharm
Basic Behaviors for Coding
- DO NOT double click on a python file to open it, instead open the FOLDER with pycharm, (or if you have to use IDLE to open the file)
- DO NOT create a folder with a .py ending, folders should not have extensions
- DO enable seeing file extensions in your OS (Windows, Mac) (otherwise .py and .pyc files will confuse you greatly)
- DO NOT create a separate pycharm project for each python file
- DO NOT put a pycharm project folder inside an existing PyCharm project folder
- DO TRY THINGS OUT, and if they don't work and you can't figure out why:
- Do not add a whole bunch of code (try to break ONE thing at a time ;)
- Add
print()statements to try to debug - Comment Out/remove code that you added when it broke
- DO ASK ME FOR HELP!! (via email, lab hours, office hours, in class, smoke signals, whatever works)
Using a portable USB drive
- Fixing the "Configure Interpreter" Error - May be needed every time your plug your USB into a new computer
Installing Python
Linux Users
sudo apt-get install python3.9(or python3.10, or 3.6 to 3.7 on older Ubuntu flavors)dnf install python3on Fedora- While you can you install python 3.x on Redhat/CentOS, you probably won't use that for your desktop
- Installing Python 3 on Linux - Python Guide
Windows and Mac
- Go to the "Files" section of Python Downloads - python.org and pick the most recent (3.8.5 or 3.8+) 32bit version that is for your OS and install. (windows x86 executable installer is a safe one for windows
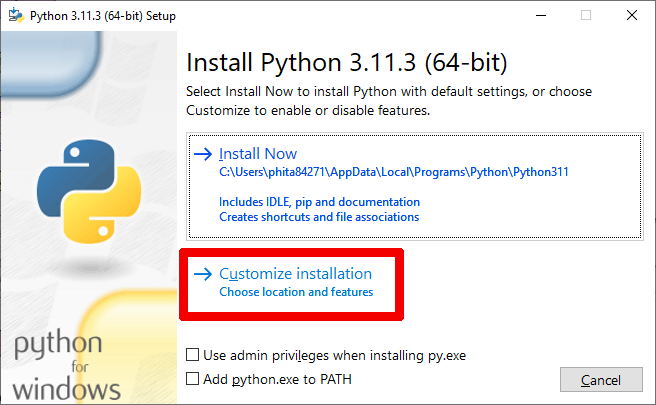
You should be able to install the most recent version of python (3.11 or higher) and use the 64 vit version. - IMPORTANT: You will probably need to install this as the windows admin on your machine, to ensure that it is set up for ALL USER. Do NOT just install it for a local user. Pycharm will have extreme problems finding that version.
- Choose the Custom Installtion option
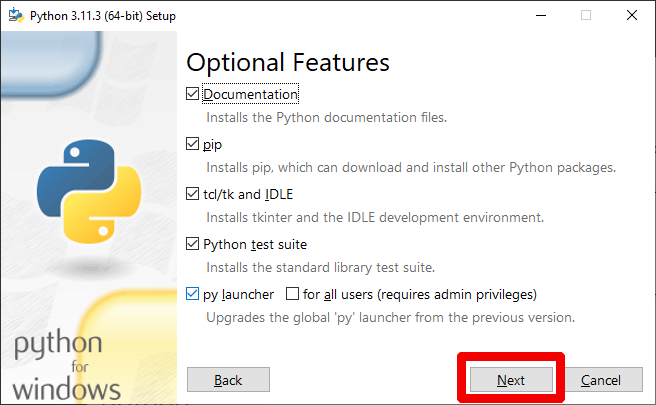
- Just choose "Next" on this step
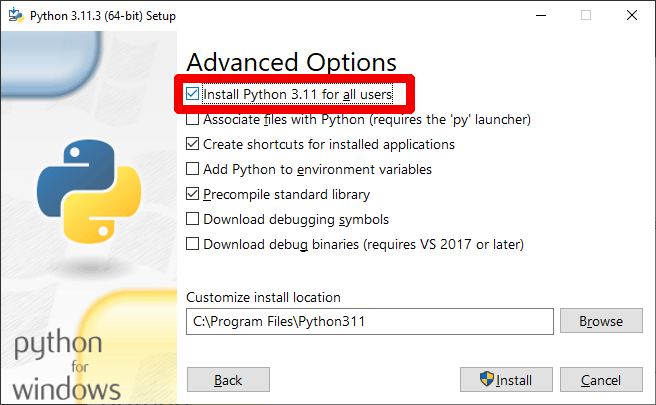
- Make sure to check the "Install Python 3.xx for ALL users"
- Choose the Custom Installtion option
- NOTE: Hopefully you will see Python 3 in the menu for windows. On mac you may have to search for it. Linux it will usually be under "Development"
Pycharm Community Edition
- while idle does work for python, Pycharm is a much nicer IDE (integrated development environment) and that is what will be used in this class
- IMPORTANT: Do NOT use it open .py files, Pycharm is PROJECT based, so you need to use it to open a PROJECT folder, NEVER a .py file.
Download
- Jetbrains PyCharm Community Download
- choose your OS (windows mac or linux) and then click "Download" under the community edition
Screen for Community
 + Then a little option screen pops up, just click OK
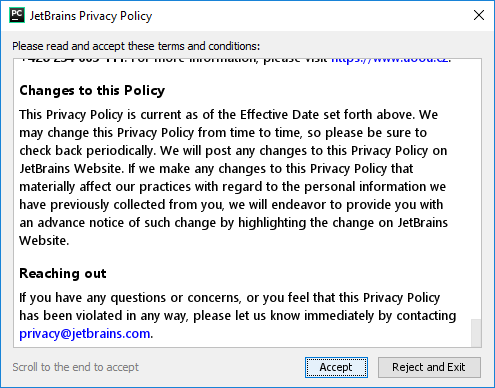
- The next window scroll to the bottom and choose "Accept"
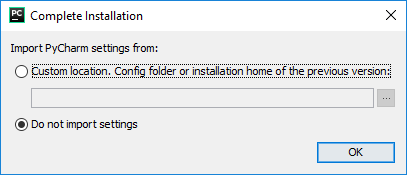
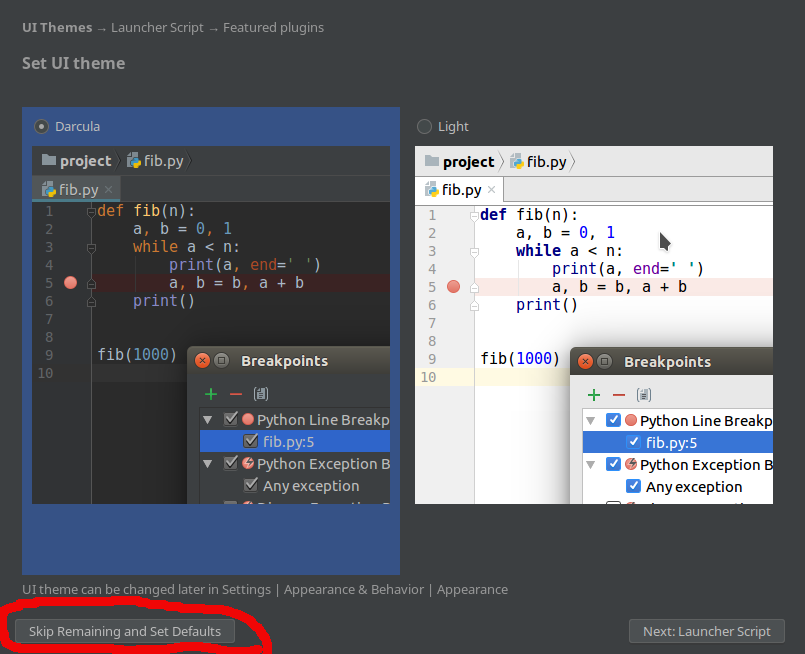
- Then you can do some initial config or just "skip remaining and set defaults"
Creating Your Project with Virtual Environment
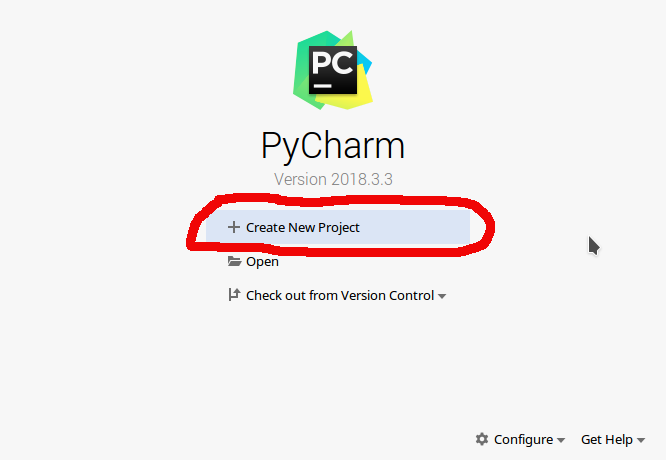
- Choose "Create a New Project" from the opening screen
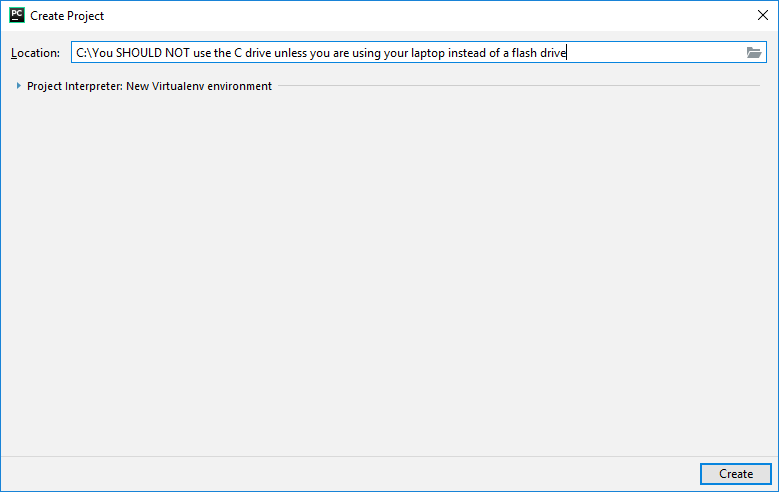
- Be very careful to not use the C: drive unless you are on your own windows laptop
- If you have not already created an empty folder for your project, choose the folder icon first
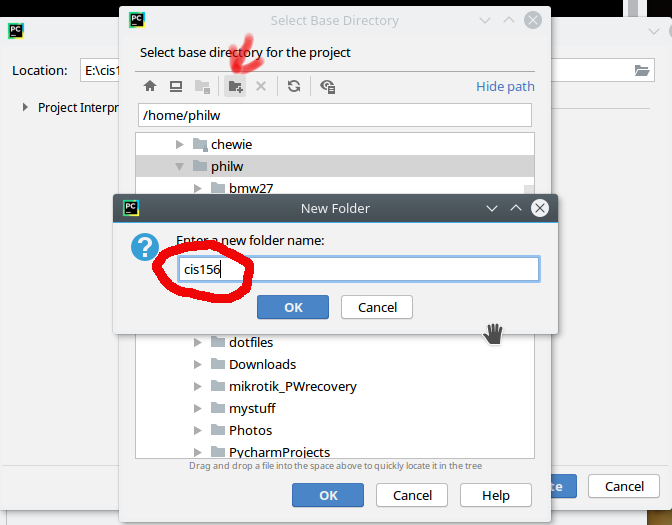
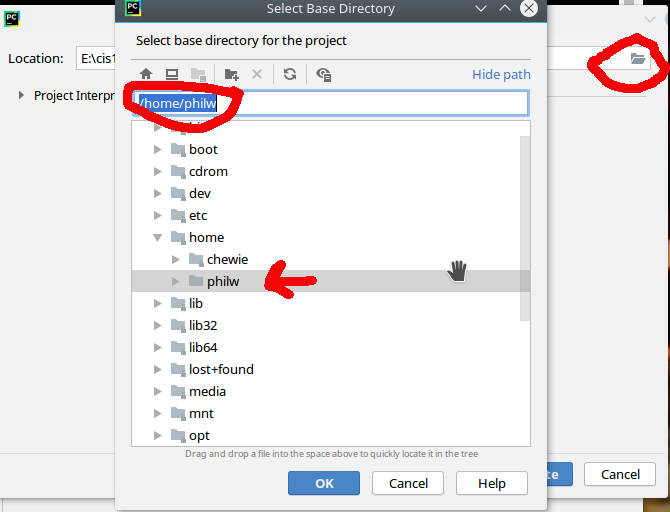 + Then either choose a folder (that should be empty) or choose the new folder icon and name it
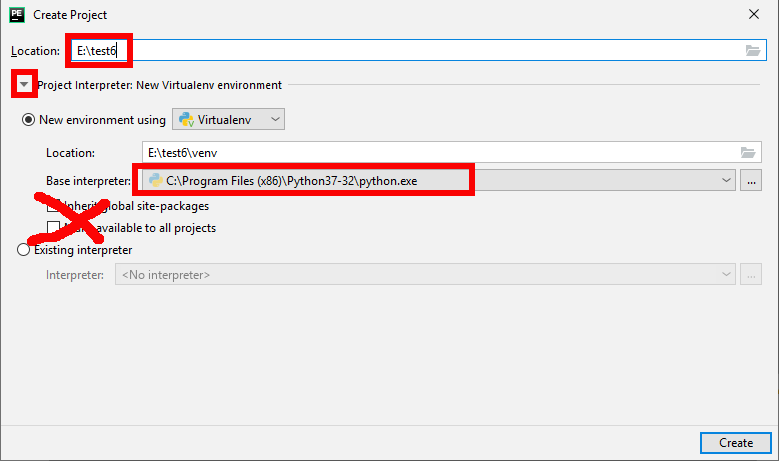
- You should now see something like this (drive letter may change depending on computer you use)
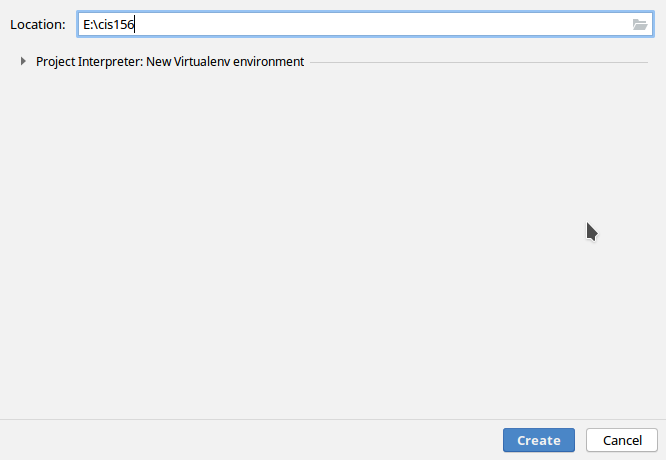
- Next, click on the arrow next to "Project Interpreter: New Virtual Environment"
- You will need to make sure it is using an interpreter that is 3.5 or newer. If you switch machines you may have to look for it, it will usually be in the c: drive under Program Files if using windows, or the following if using a Linux box (not sure on mac?)
- Do NOT check the two boxes that are crossed off with a red X
- Remember, your directory is probably NOT called "test6" so change things as appropriate.
- Once you accept the changes, it can take about a minute to create your virtual environment
 + You may need to add modules to it later, as we created a bare bones virtual environment
+ In the future you will use OPEN PROJECT and just point it to that directory, but you MAY have to reset the interpreter if you switched machines
+ You may need to add modules to it later, as we created a bare bones virtual environment
+ In the future you will use OPEN PROJECT and just point it to that directory, but you MAY have to reset the interpreter if you switched machines
Creating a new Python File to get to Work
- Make sure to select the project name in the left hand menu
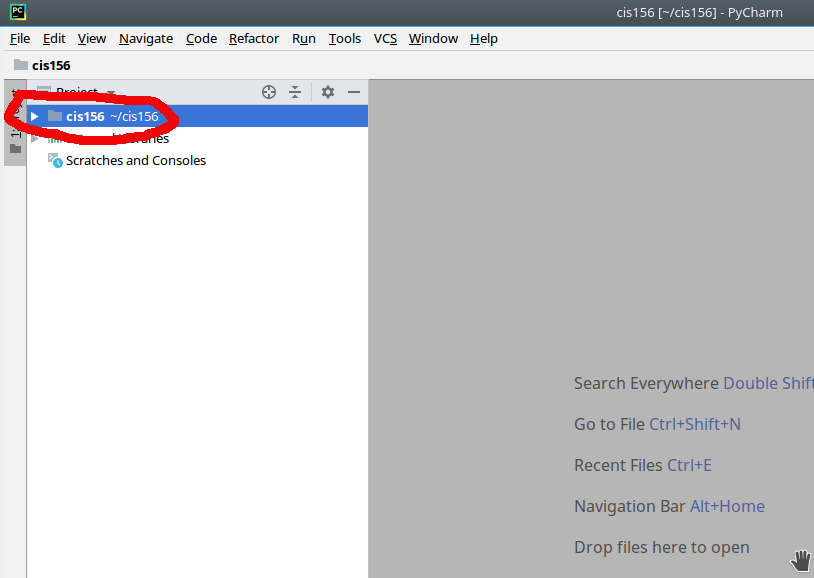
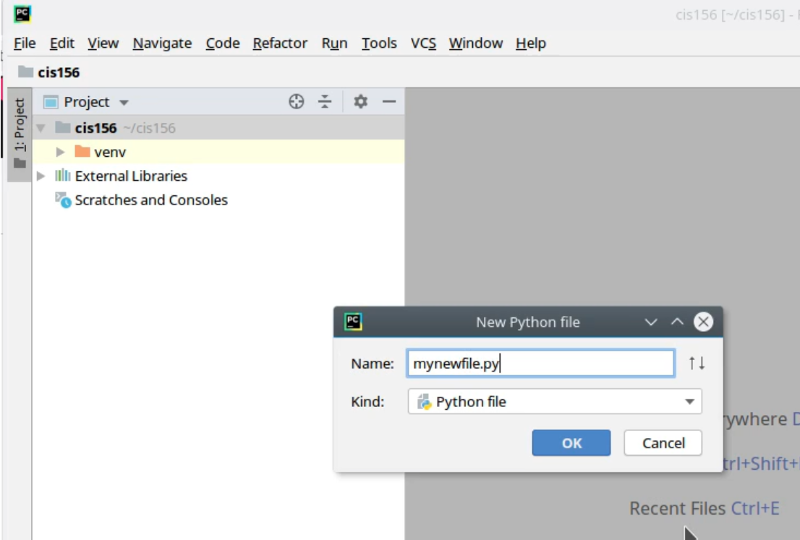
File -> New -> Python File(if you only see "Scratch File" make sure to highlight the project name)

- Then choose your filename "something.py"
- You can now start importing modules and coding away!
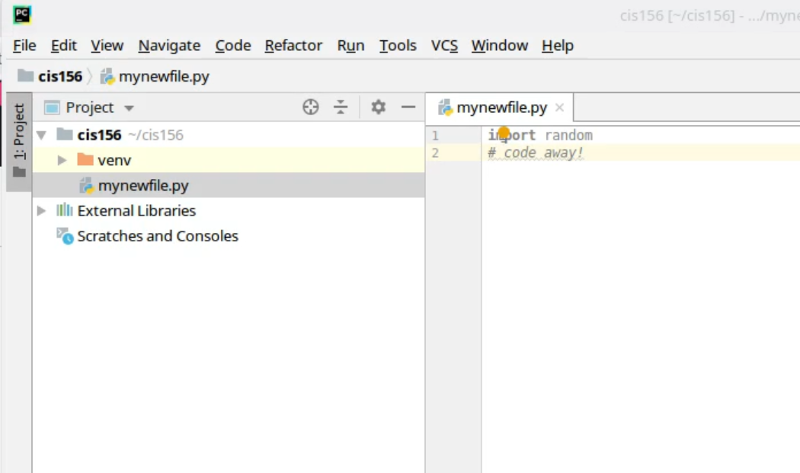
- Remember to not use
spacesin your filenames and do not name a file after a module (ie don't create a "random.py" )
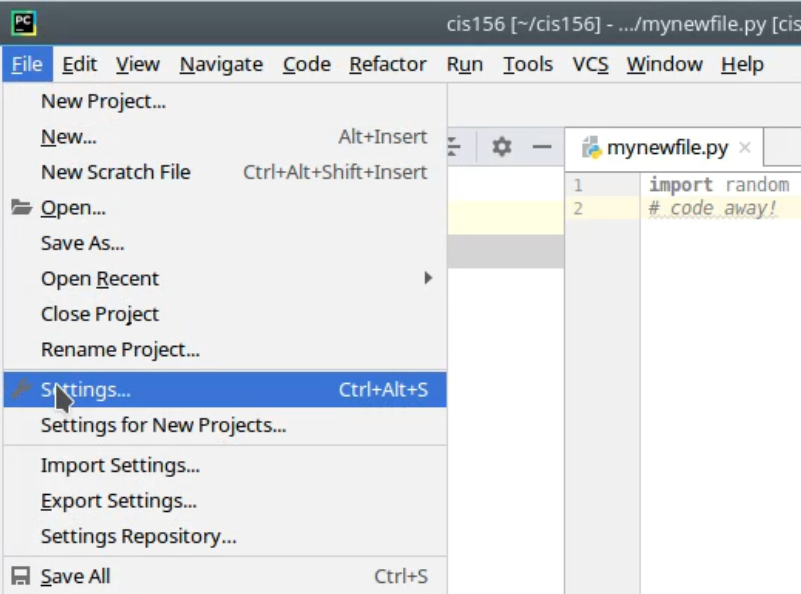
Changing some of the Settings for Pycharm
File -> Settings
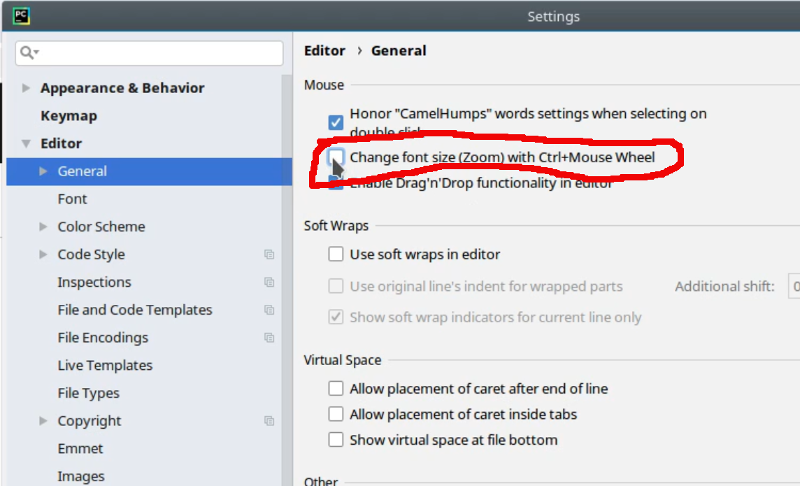
- One that is handy for me is to enable zoom via ctrl-mouse wheel by:
choosing "General->Editor" from the side menu of the Settings window
Adding Modules to your Project's Virtual Environment
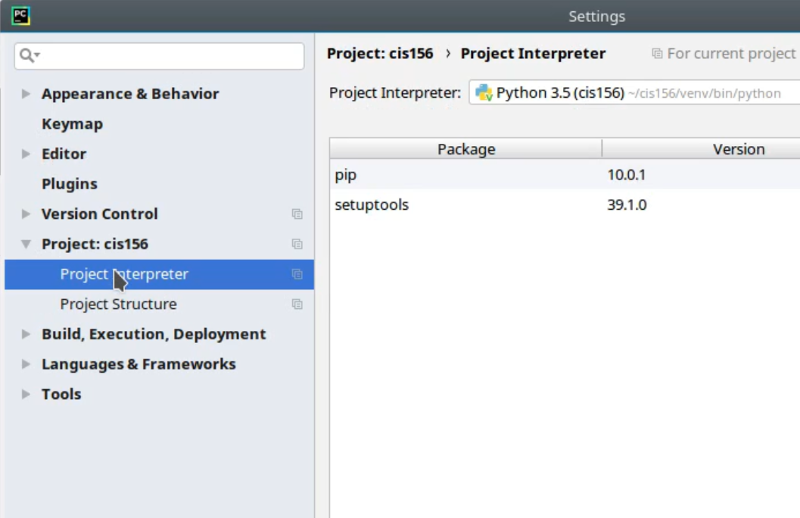
- Then in the Settings window go down to
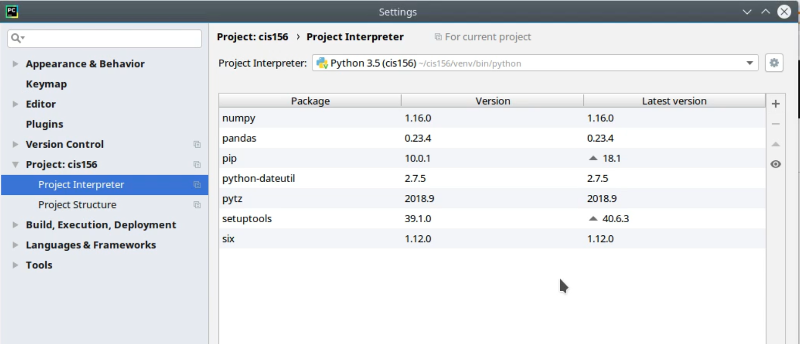
Project: cis156(or whatever you named your project) and thenProject Interpreter
- Then click on the + sign to add a python module
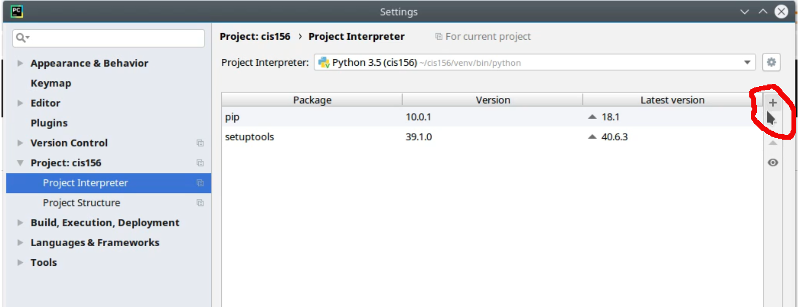
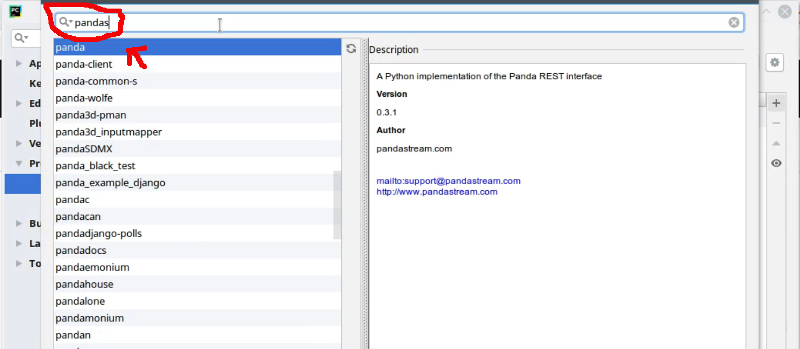
- Type the name you are looking for in the module search bar, and make sure you choose the correct one. There are a lot of similarly named modules.
- Click on
Install Packagetowards the bottom of the window, and wait. Once done you should see the green status bar saying it installed. When done, just close that window.
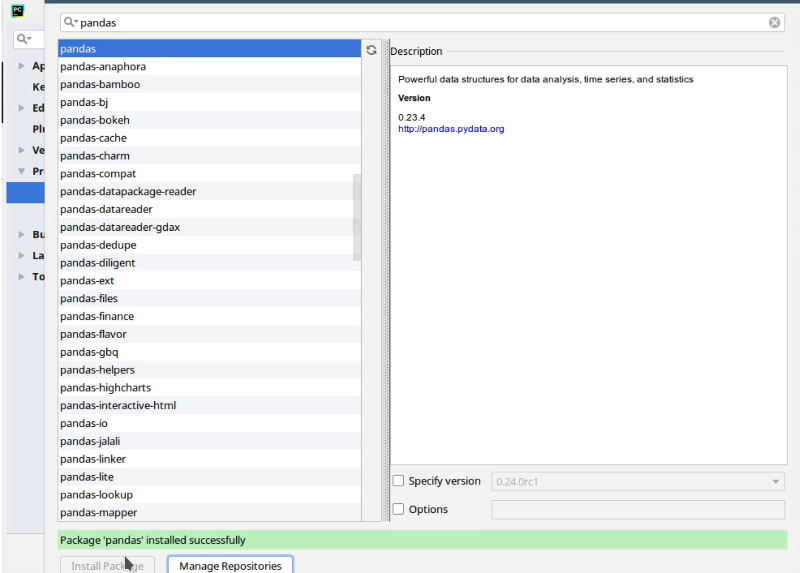
- You will note that pandas and several other modules were installed. You can now close the settings window, and get back to work. And of course, you can now safely do
import pandas