Filezilla Tutorial
Transfer files securely using sftp and ssh keys
Basic Concepts
FTP (file transfer protocol) software is used to transfer a copy of your files from your computer to a remote computer, or to download files from a remote server. This is mainly used to transfer files onto a web server so that folks can SEE your files. So if you need to upload a picture, flash, mp3 or html file, Filezilla is a great open source program for you. And while it takes a few steps to set up, it supports SFTP (Secure File Transfer Protocol) which is required for uploading your web files. NEVER use a username/password unless the program supports encryption, which is why SFTP is required.
Command Line
- (for Mac/Linux users if you do not want to use Filezilla)
- This may require you to put the
.pemfile in a.sshfile in your users home directory (~/.ssh/) and set permissions withchmod 600 filename.pem - To connect
sftp -i ~/.ssh/filename.pem -P 111 username@hostname.com(make sure you have the path, filename,port and username for the server you want to connect)
Download and Install Filezilla
- Go to Filezilla and click on:
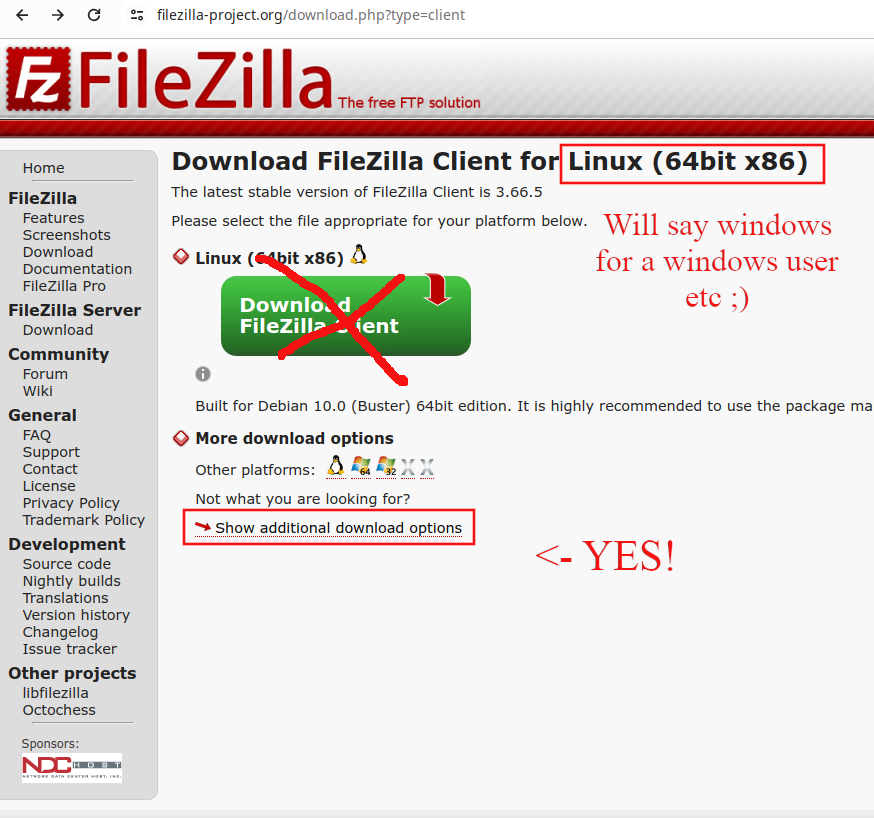
- It should detect your Operating System and provide a link to download the CLIENT (do NOT choose the Server)
- WARNING!!! HOWEVER, the main link now includes some annoying adware, and shows up as a "virus" on most machines so, instead choose "Addtional Download Options"
- Then choose the appropriate link for your OS (I have the windows one highlighted in red)
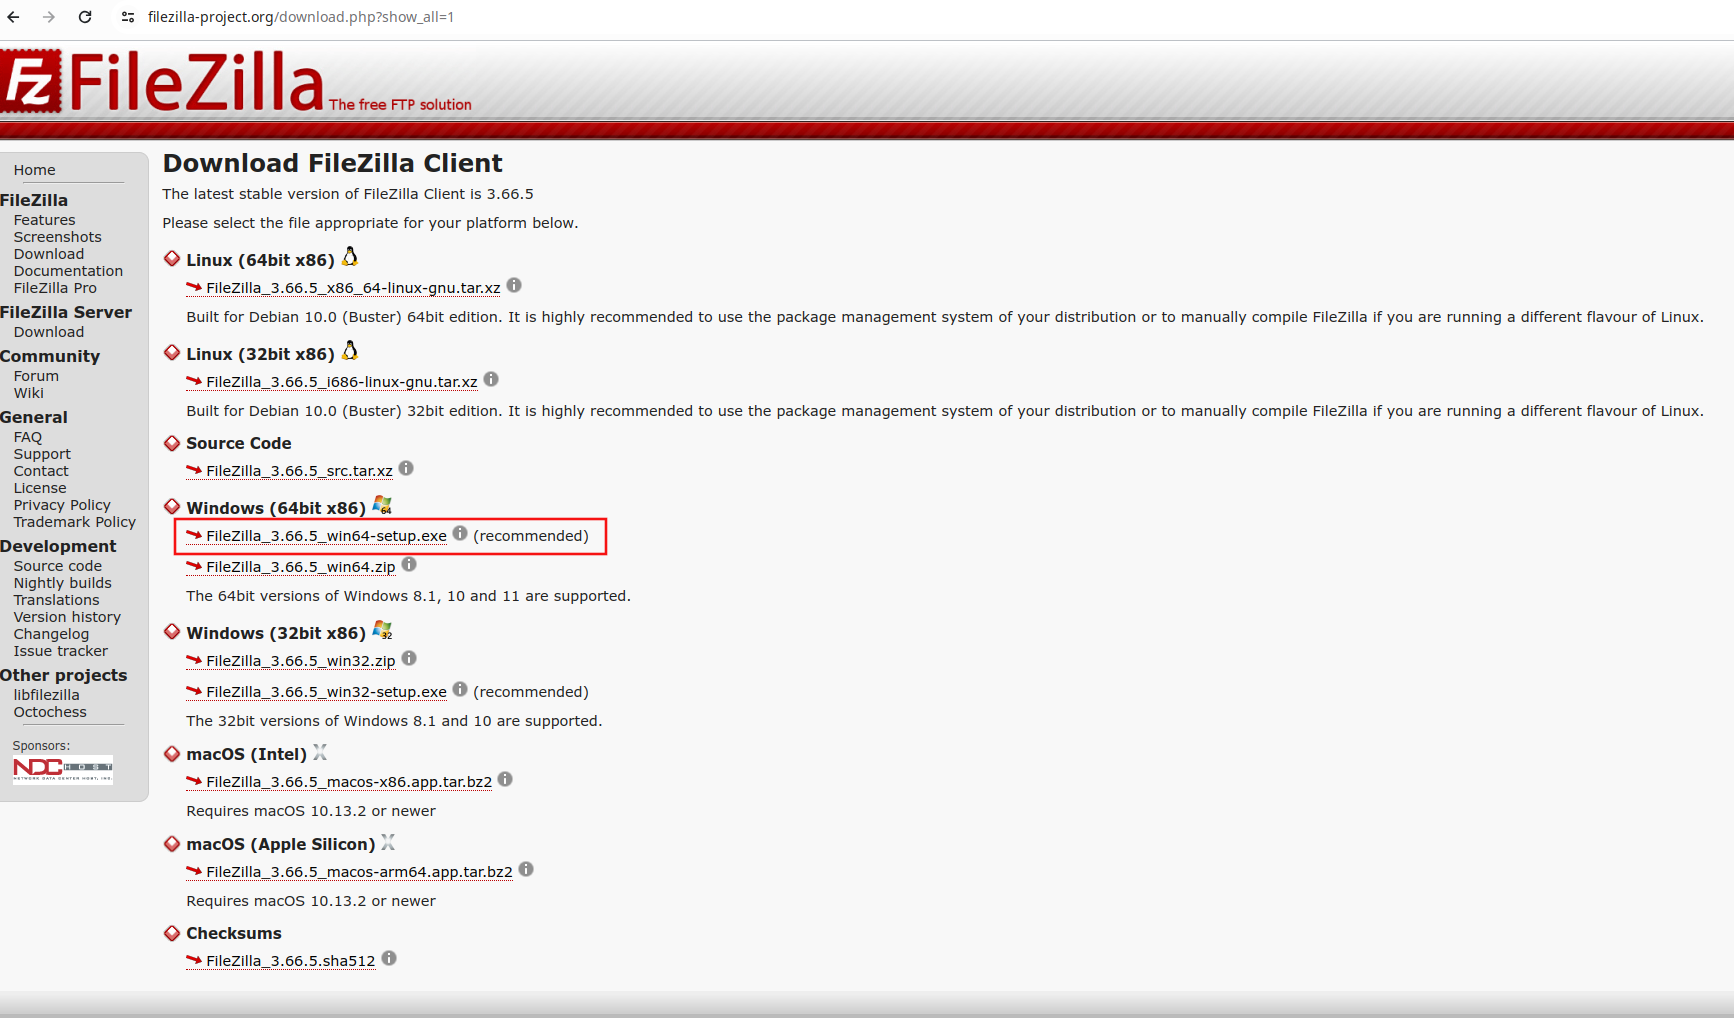
- WARNING!!! HOWEVER, the main link now includes some annoying adware, and shows up as a "virus" on most machines so, instead choose "Addtional Download Options"
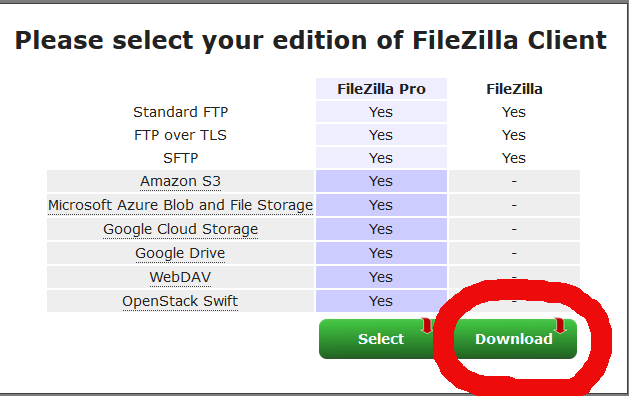
- Another dialogue box should pop up, asking if you want the "Pro" version, or the free version. Just get the regular free version.
- Run the installation program and install Filezilla
Connecting to the Server
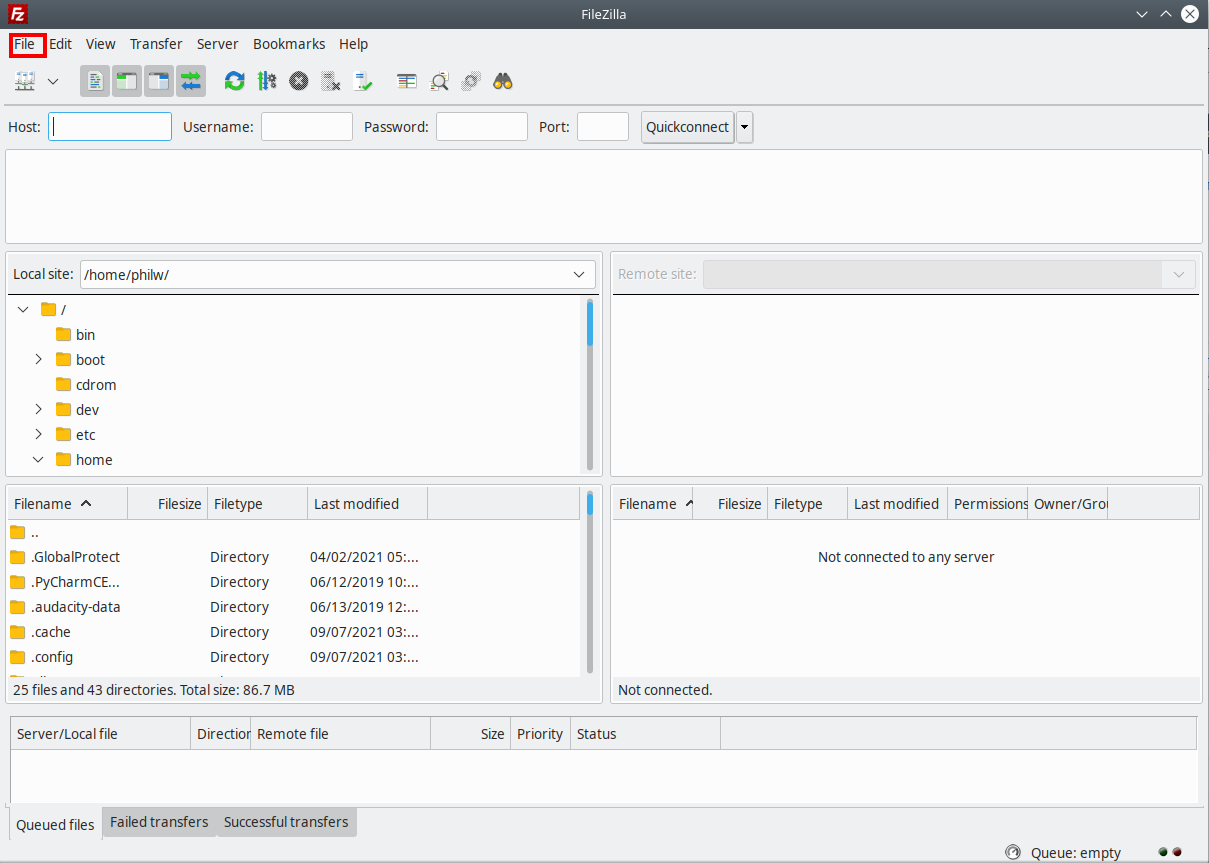
- After filezilla has been installed, start the program.
- Then click on "File" and then "Site Manager"
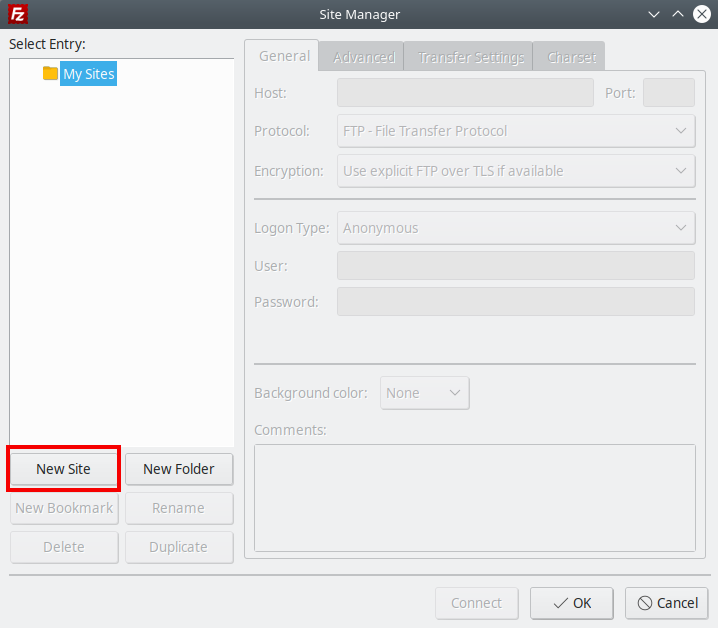
- Choose "New Site"
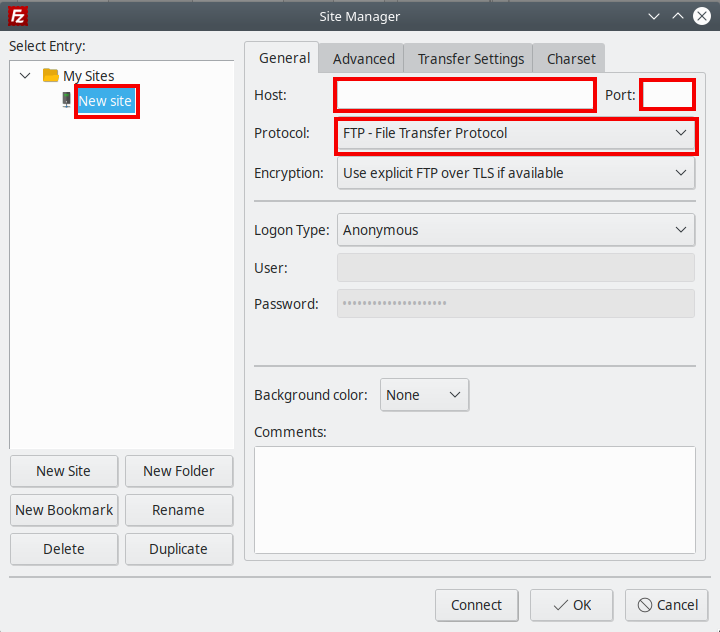
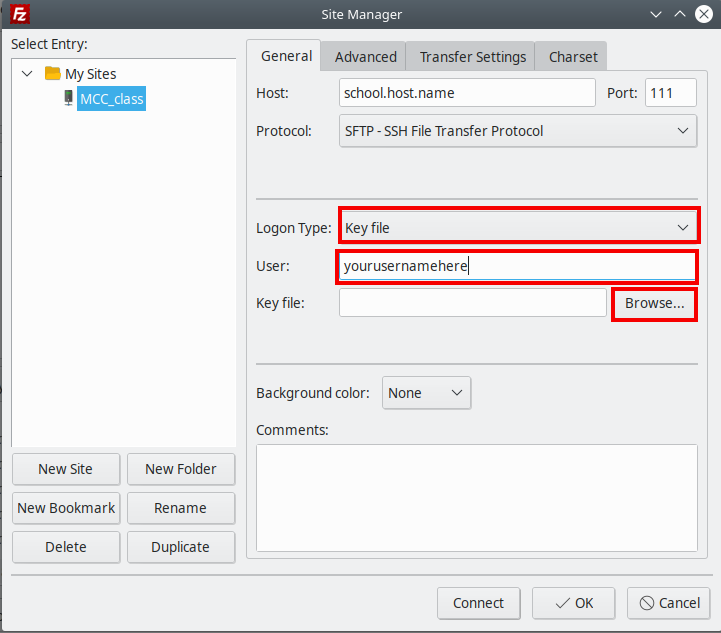
- Give your "New Site" a name (mccserver??) and then fill out
- Host: hostname.com goes here (name is in Canvas)
- Port: port # is in Canvas)
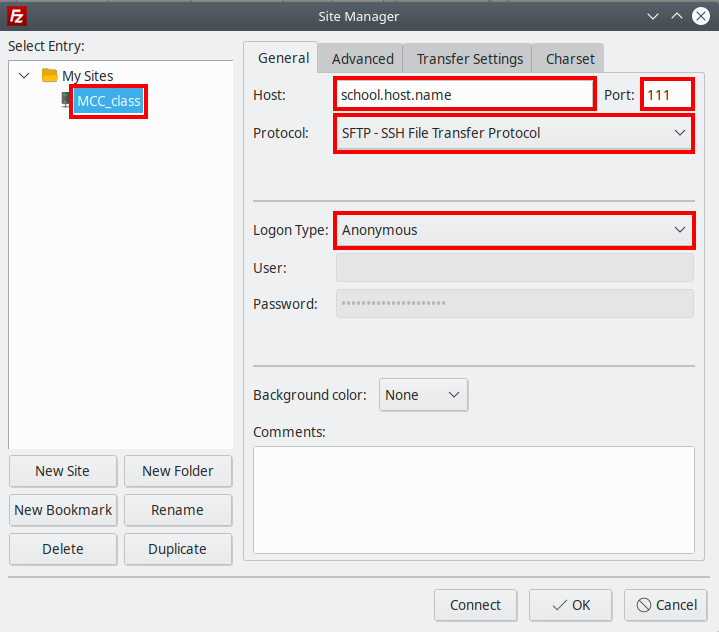
- Protocol: Change to SFTP
- Change "Logon Type:" from "Anonymous" to Key File
- Filezilla used to require the key file in ppk, and it is still the best choice. Always try that first.
- For "User:" put in the username set up in class and then click Browse to locate your key file
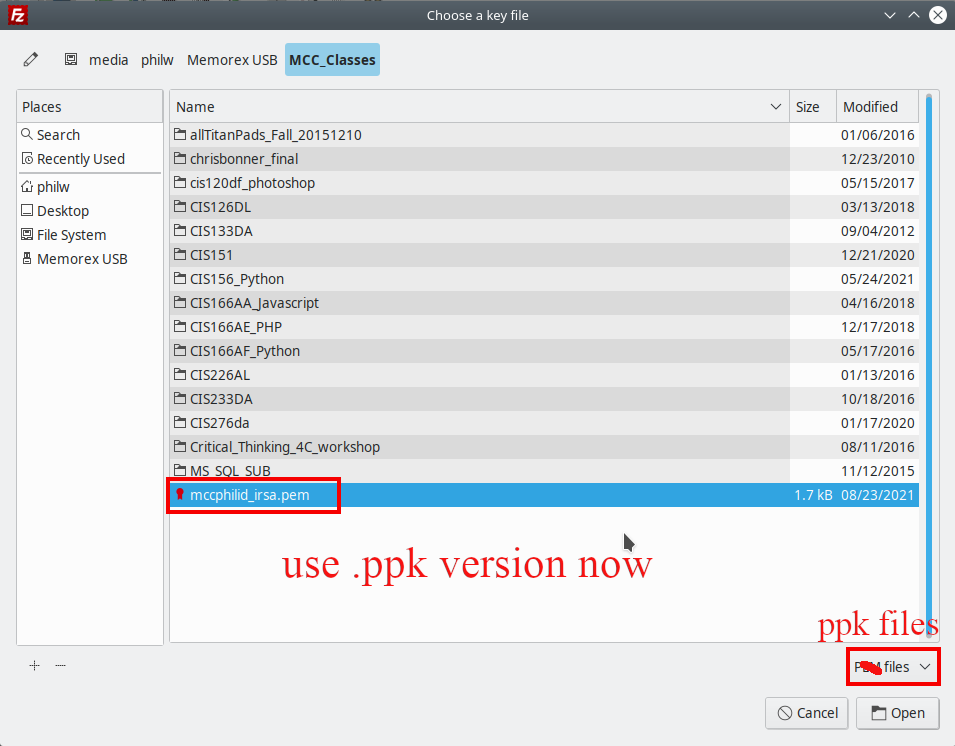
- The "Choose a Key File" window pops up. Make SURE that you have it set to ppk files (in the lower right corner) and then find your
.ppkfile and select it, and Open
- The path to the key file should now show up, and you can Connect
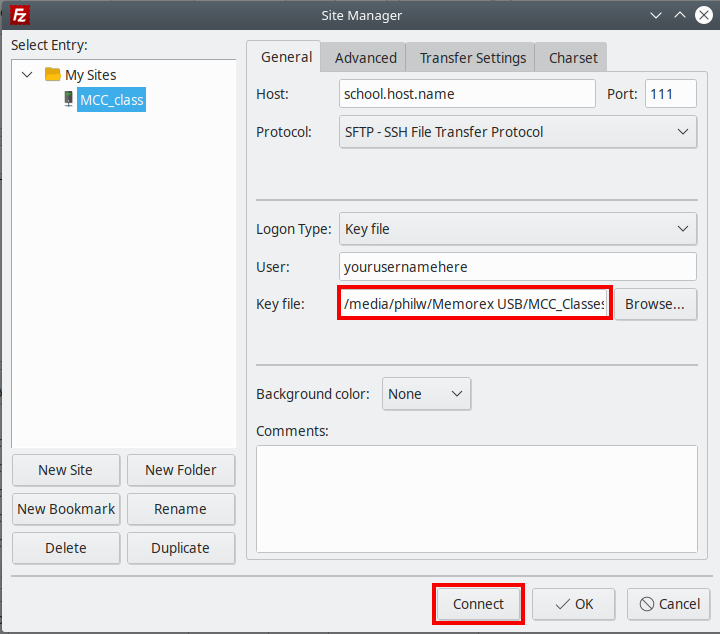
- IF all goes well, you should see the active connection Transfer Page

- Note: the public_html folder is JUST for your web/html files
- DO NOT put anything in public_html that should not be available to the entire world
Using the Filezilla Tool
- Note, the following focuses on uploading files for a web site, but the basic concepts are the same regardless of what files you are transferring.
Parts of the Program
- On the left side you see Local site
- This is YOUR machine
- Most of the time you will transfer your local files to the Remote Site aka up loading files
- On the right side you have the Remote site:
- The path starts out in your home directory, which will be
/home/stu/yourusernamehere(obviously it will have YOUR username, not the word "yourusernamehere" - For your files to be available for viewing, you must transfer them into the public_html folder
- Double Click on public_html and the Remote site: path should now be
/home/stu/yourusernamehere/public_html
- The path starts out in your home directory, which will be
- on the left side, you can now transfer a file from your machine to the remote machine in 3 ways
- double click on the file you want to send
- click and drag the file from the left side to the right side
- right click on the file and choose "upload"
The Web Url
- Remember to use the actual hostname, username and filename, do not actually type "school.hostname.com"
https://shool.hostname.com/username/filename.html(note, for the homepage, index.html, no filename.html is needed, so do not put index.html after the username- username in the URL points to the public_html folder in your home directory, so it will not be part of the URL
- If you have a sub folder in public_html, such as "scripts" and you had a file called "test.html" the path would be
https://school.hostname.com/username/scripts/test.html
Reasons why your content may not be showing
- you put the files in the wrong folder. If you put them in
/home/stu/yourusernamehereinstead of/home/stu/yourusernamehere/public_htmlyou will have to delete the file and re upload it. Do not just try to move it on the "Remote site:", it will have the wrong security context and it will not be viewable. - you made a mistake typing up the URL
- You forgot to upload a file
- Your HTML/code has an error in it
- You forgot that the internet is case sensitive, so your file is sports.html but the URL has Sports.html


